If you’re building an app, you’ll have to deal with bugs, there’s simply no way around it.
Luckily, instead of letting the bugs weigh your project down, you can manage and resolve them with a bit of planning.
In this article, we’ll go over the crucial steps you need to take to tackle bugs. You’ll see how to effectively report, categorize, assign, and, ultimately, close bugs.
We know that there’s no better feeling than clicking the resolved button in a bug-tracking platform. However, the process begins with reporting bugs properly, so let’s start with that.
Table of Contents
Creating a bug report
To fix bugs, you first have to know what you’re fixing, which is why you should start your bug-tracking process by creating reports on the bugs you find.
Bug reporting is a process in which QA engineers track, describe, and categorize bugs so that developers know what application parts need to be repaired.
Below is an example of a bug report, created by the task management tool ClickUp.
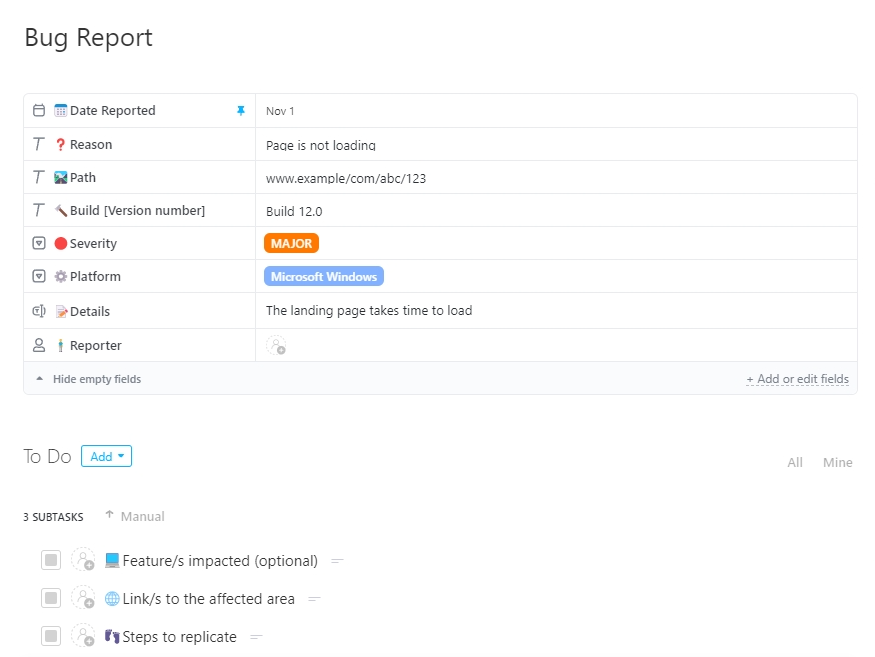
As you can see, there are way too many data points to track for each bug, so it’s a good idea to use bug report templates.
Templates can help you create uniform reports, bringing consistency into your QA process.
You’ll be able to tackle bugs the most efficiently if your reports are well-written.

Get unreal data to fix real issues in your app & web.
Imprecise bug descriptions can derail your entire QA process because then developers have to spend time investigating how and when bugs occur, which you can avoid by providing clear-cut, accurate explanations of the bugs you find.
Some good and bad examples of bug descriptions, provided by Bugzilla, are shown below.

So, now you know that templates and clear bug descriptions can help you improve the first step of the tracking process. But did you know that you can streamline bug reporting even further?
With automated bug reporting, you don’t have to waste time writing down the details that a piece of software can note automatically.
For instance, the environment description—one of the crucial elements of a report—requires you to specify the device type, OS, software version, and connection strength.
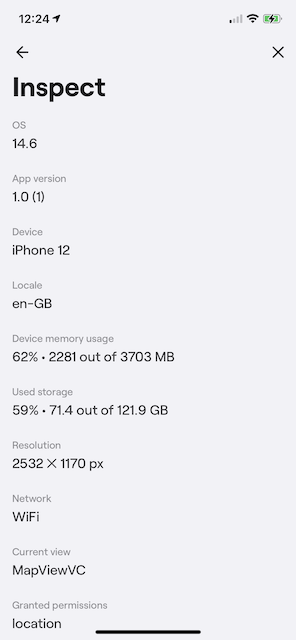
Typing these details manually takes time, so it’s much more efficient to automate as many parts of bug reports as you can.
Shake, our bug and crash tracker tool, is the perfect solution for that.
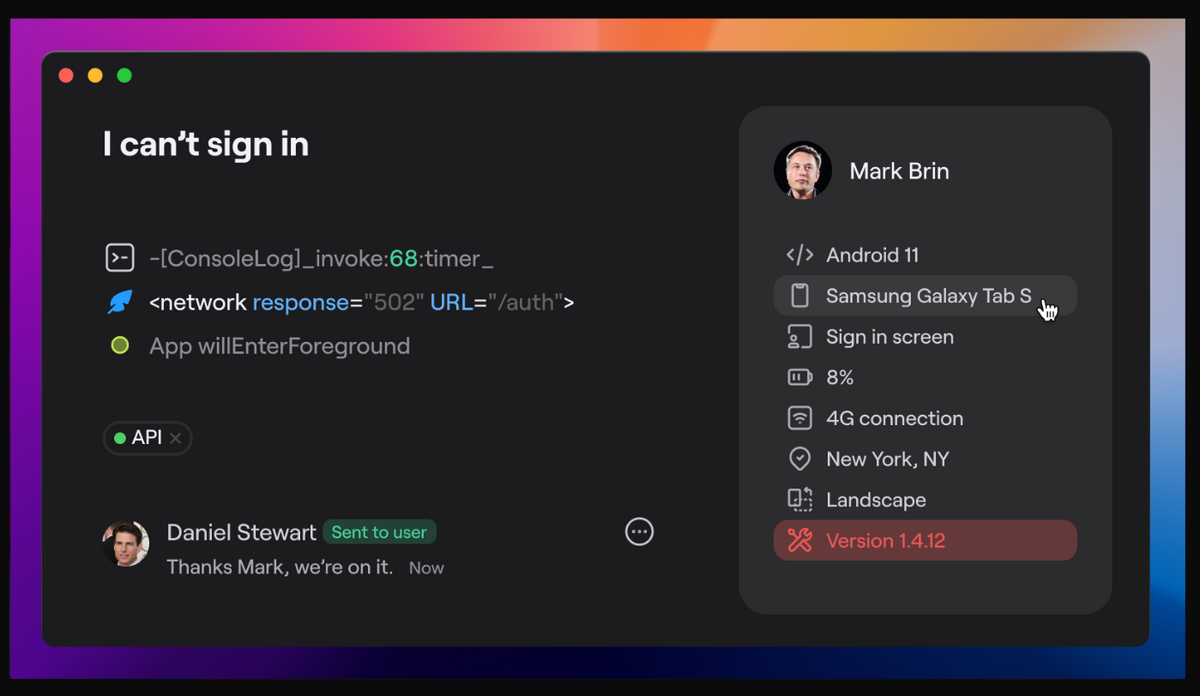
The tool lets you submit reports with data attached automatically.
And it’s not just the version and the OS that get documented—we’re talking about 71 unique data metrics included in the report with no effort from your testers.
That way, your testers only have to describe the bug and state how it compares to expected results. Screenshots are attached automatically, too.
Ideally, you’ll catch most of the bugs before you ship your product and use internal bug reporting along the way.
However, a more realistic scenario is that some bugs will fly under the radar and give the end-users trouble.
In that case, you can examine the bugs that users find, test them again, and create reports for these bugs as well.
So, whether you’re dealing with internal or external bug sightings, creating thorough yet coherent bug reports should be the first step toward eradicating the digital pest.
Performing bug triage
Once you’ve made bug reports, a significant chunk of work is out of the way—yay! Next, it’s time to perform the bug triage, i.e., to prioritize the resolution of defects.
Think about an ER triage for a second.
A patient may walk in at 7 AM complaining about a splinter in a finger. Another patient, experiencing severe respiratory distress, is carried in at 11 AM. Who will the staff treat first?
That’s right—the order in which patients have arrived doesn’t matter, it’s the severity of their condition that counts. The same principle applies to software bugs.
Bug triage meetings are held to determine in what order developers should squash bugs. There are two factors that you need to consider during the triage process: bug severity and priority.
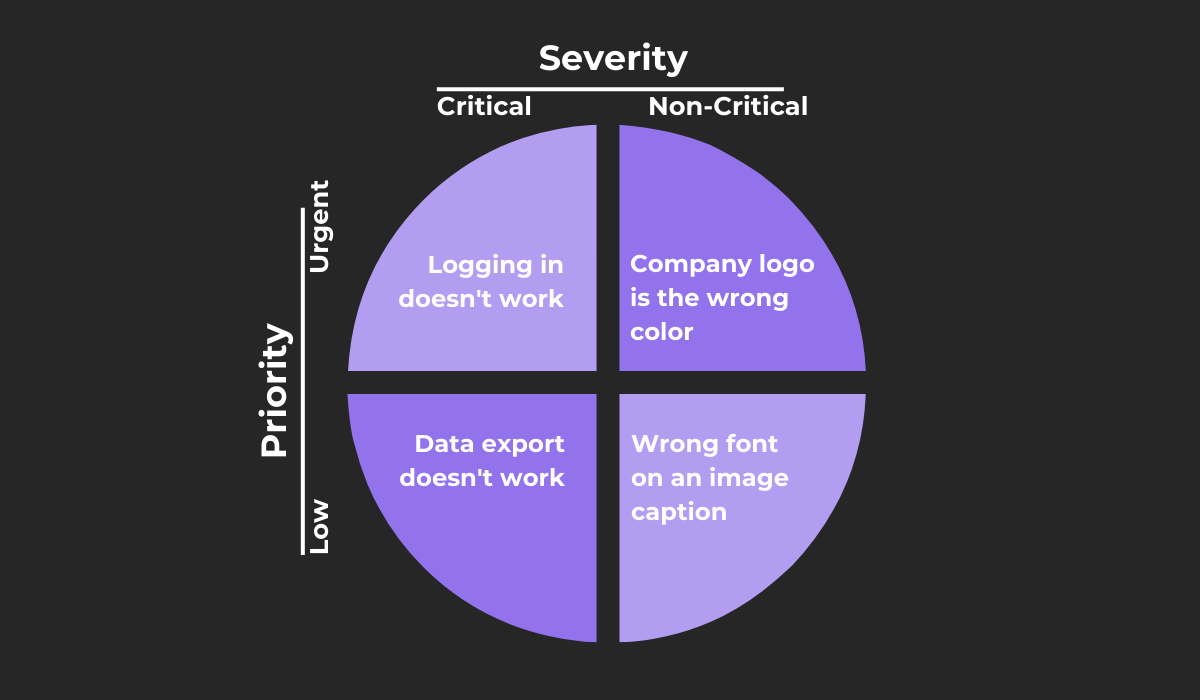
As the chart above shows, bugs can range in severity from critical to non-critical, and their priority can be low or urgent.
For instance, if a QA engineer testing a shopping app catches a bug related to the inability to view tracking information on old orders, you can hardly classify that as a defect that requires immediate attention.
The defect might be critical, but it isn’t urgent.
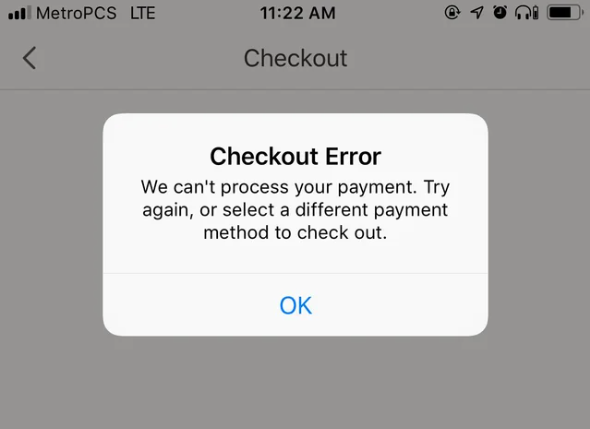
On the other hand, there are bugs that make the entire application unusable and should therefore be resolved as soon as possible.
One such example is this checkout error on the eBay app that prevents users from buying items, which is the purpose of the platform.
You can learn more about defect severity and priority in our blog post about the topic.
After you’ve gathered bug reports, sorted bugs by severity and priority, and set due dates, the amount of work in front of you may seem overwhelming at first.
However, Mark Finkle, VP of League, says that a big backlog of bugs isn’t an obstacle in your project. It’s exactly the opposite—you have proof that your app is thoroughly tested.
Don’t be frightened by a large quantity of bugs in your backlog. It just means people are testing your software, which is a good thing.
Finkle also advises a dynamic approach to bug prioritization. As he puts it, bug metadata is not set in stone. Situations can change, and so can bug prioritization.
To sum up, not all bugs are equally important.
If you want an actionable plan for fixing the bugs, you’ll have to hold triage meetings, determine the bug priority, and assign bugs to developers within the development team.
That way, you’ll have a strategy that your team can follow to stay accountable and fix defects in time, ensuring that you can ship a bug-free product.
Tracking bugs through their life cycle
Out of sight, out of mind is an attitude to keep in mind in the process of QA and development.
If your team doesn’t know the status of a bug, the bug will soon be forgotten, only to reappear in the final version that clients use, and nobody wants that.
So, to sustain the optimal workflow when it comes to bug resolving, you need to be vigilant about tracking the bugs from when they’re found until they’re fixed.
The process is a bit more complex than just noting whether a bug is identified or fixed. That’s why there are several statuses that let you know what’s going on with a bug at a glance.
These statuses are:
- open
- in progress
- cannot reproduce
- duplicate issue
- on hold
- fixed
- closed
Using such labels will help you track the progress of resolving bugs, and you’ll be able to react immediately if you see that there’s an issue along the way.
You’ll also notice that the number of bugs is not permanent—bugs are constantly added and removed through the workflow, which is another reason why a clear overview of their status is helpful.
However, none of this will work if you label a bug as open in a spreadsheet, message a dev about it via Slack, and document bug issues in emails.
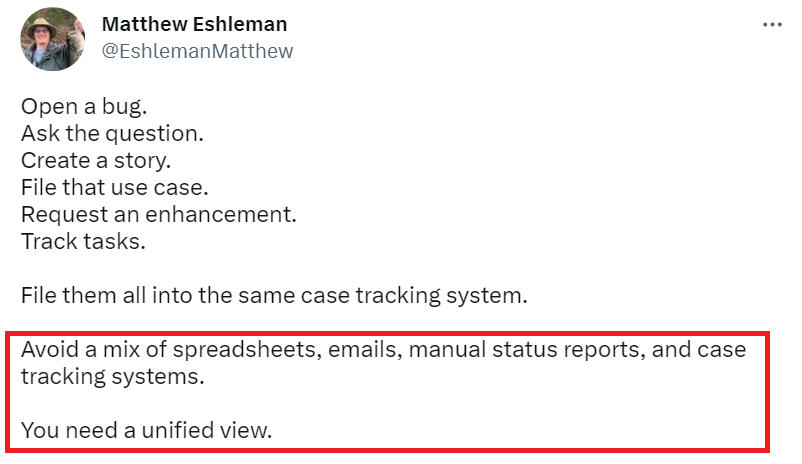
Instead, you need a unified view of bugs, and you can achieve it by choosing powerful tracking tools for your team.
Note that different roles participate in bug removal, such as QA testers, developers, and project managers. Because of that, it’s common to use project management tools for bug tracking.
For instance, Atlassian’s Jira can help you make bug tracking accessible to all team members.
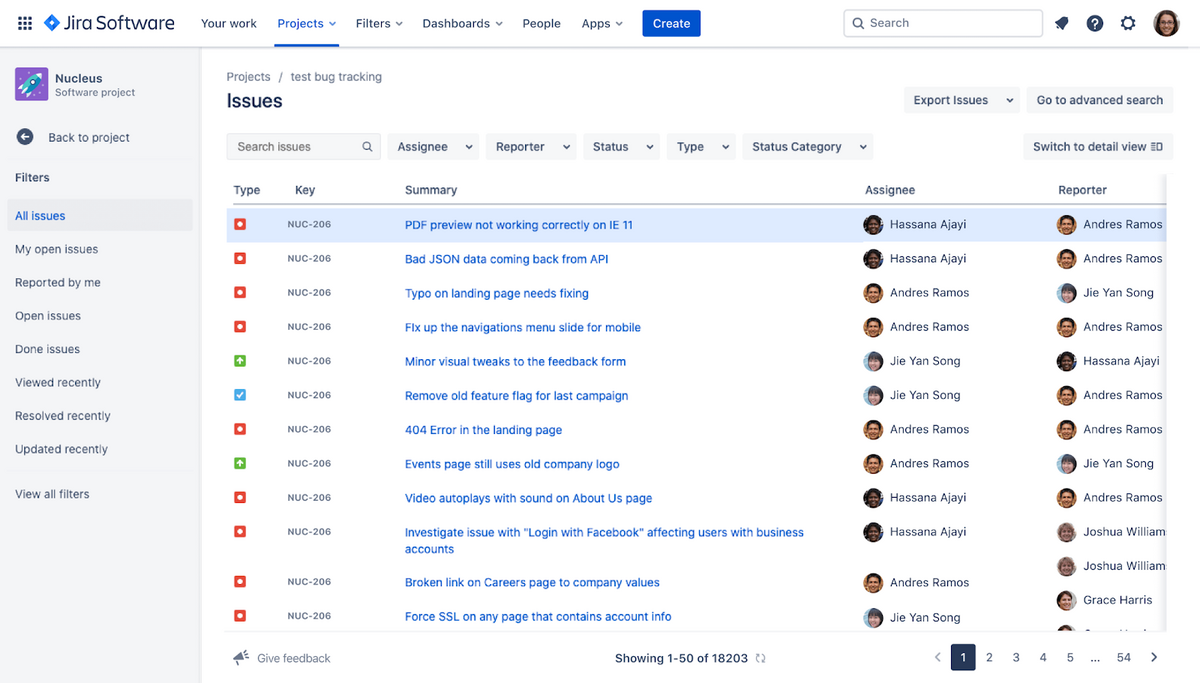
When choosing the tracking tool, you should consider the integrations with the tools that your QA testers use to report bugs in the first place.
If you decide to report bugs with Shake, you’ll have no problems with this because the platform integrates seamlessly with Jira, Trello, Asana, ClickUp, and other management and communication solutions.
All in all, effective bug-tracking apps and regular bug status updates will help you keep your QA testers, devs, and managers in the loop so that they can efficiently work their way through the backlog with no bugs left behind.
Closing the bug
Lastly, after you’ve fixed a bug, you have to close it and make sure that it’s publicly marked as closed.
But before checking that final box, it’s important to verify that the bug is actually fixed because, just like real bugs, app bugs are often resilient.
You may think you’ve seen the last of them, and then the bug reappears a week later.

Very handy for handling user feedback. CTOs, devs, testers – rejoice.
To avoid that, you have to ensure that you’ve covered all edge cases and scenarios in which the bug appears. A strong collaboration between testers and developers will help you achieve that.
Although the process varies by company, a standard practice for closing bugs is that the same person who first reported the bug is also responsible for marking it as closed, as is the case in this Atlassian specialist’s company.

Keep in mind that sometimes a bug may seem fixed, but there can be subtle ways to trigger the same bug.
So, a developer may note that the bug is fixed, but you shouldn’t take their word for it—testers should comb through the app again and only close the bug when they’re certain that it no longer exists in any scenario.
The way to closing bugs is not always straightforward. In some cases, it takes several team members to work on a bug.
For instance, it took five different people and a bot to resolve this WordPress bug about a quote block error.
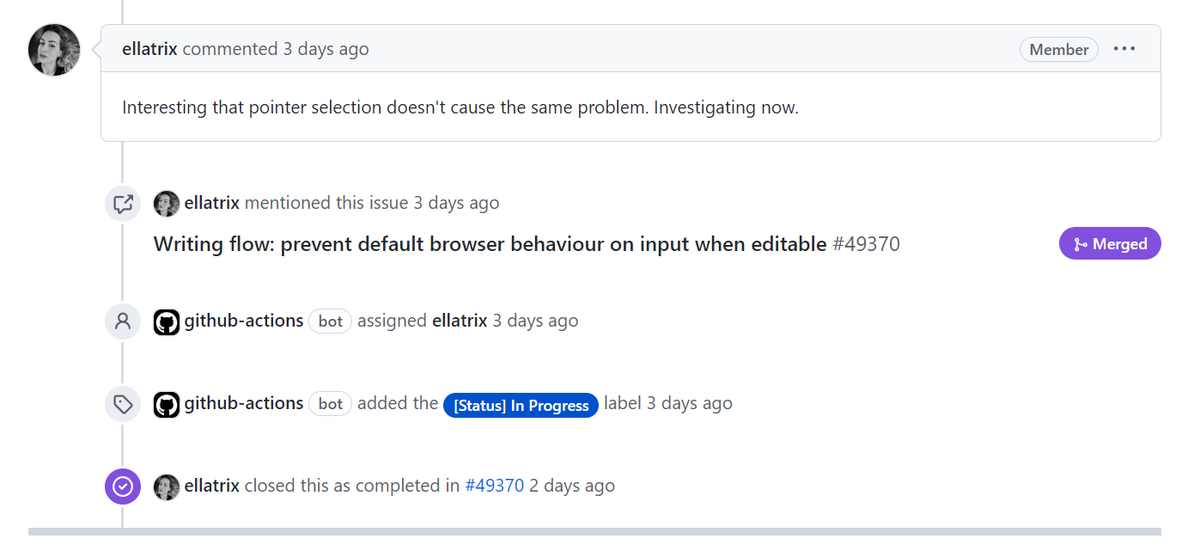
Whether it takes two or five people to fix a bug, once it’s dealt with, make sure that everyone knows it’s closed.
That way, the team can move on to the next bug and work in a focused and productive manner.
Conclusion
You could be using the best software and tools out there to build your products, but the bugs will still find their way in.
Don’t worry!
If you act preventively and establish a plan for dealing with bugs, you’ll be able to keep them in control and ship bug-free products without delay.
So, make sure that your workflow includes the four steps of bug tracking that we’ve just seen, and you’ll turn bugs from an inconvenience into a manageable part of app development.


