
If you’re beginning a new project, your best bet for a smooth start is a project kickoff meeting.
Dedicated to laying the groundwork, this meeting is an opportunity to draft your project’s plan, align team members, and organize the next steps to complete the project.
Given the meeting’s importance, it’s important to cover all the essential talking points without leaving out any important details.
With that in mind, we’ve prepared this checklist. Go over it when starting your next project, and you’ll have everything you need for a productive project kickoff meeting.
Table of Contents
1. Meeting time
Perhaps the most critical item on the project kickoff meeting agenda—one that should be printed at the very top of the document—is the meeting time.
The kickoff meeting marks the formal beginning of the project and outlines its main points.
Given its importance, you’ll want absolutely everyone present, so you’ll need to choose a time that suits everyone’s schedule.

Get unreal data to fix real issues in your app & web.
One of the easiest methods to determine an acceptable meeting time is to use a meeting scheduling tool such as SavvyCal.
This tool allows team members to overlay their calendars on one interface to find the perfect meeting slot.
Here’s the resource in action:
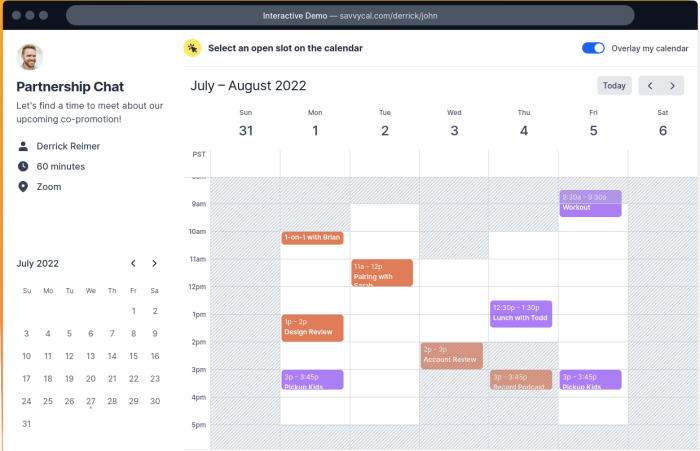
The two different colors indicate two separate team members, so the calendar displays both individuals’ schedules.
Apply this feature to all of your team members’ calendars, and you’ll be able to see everyone’s availability and find the perfect slot for your kickoff meeting.
2. Introductions time
The first order of business during the actual meeting should be introducing all the attendees.
It’s relatively unlikely that everyone on the client team will know everyone on the development team and vice versa.
However, considering that you’ll all be collaborating for an extended period of time, you’ll want everyone to be familiar with one another.
Although the kickoff meeting’s primary purpose is product alignment, it’s also essential to strengthen working relationships—which is why you want everyone to get off to a good start.
If your coworkers are comfortable with one another, they’ll have a much easier time collaborating.
Ben Aston, the founder of The Digital Project Manager, has also commented on this:
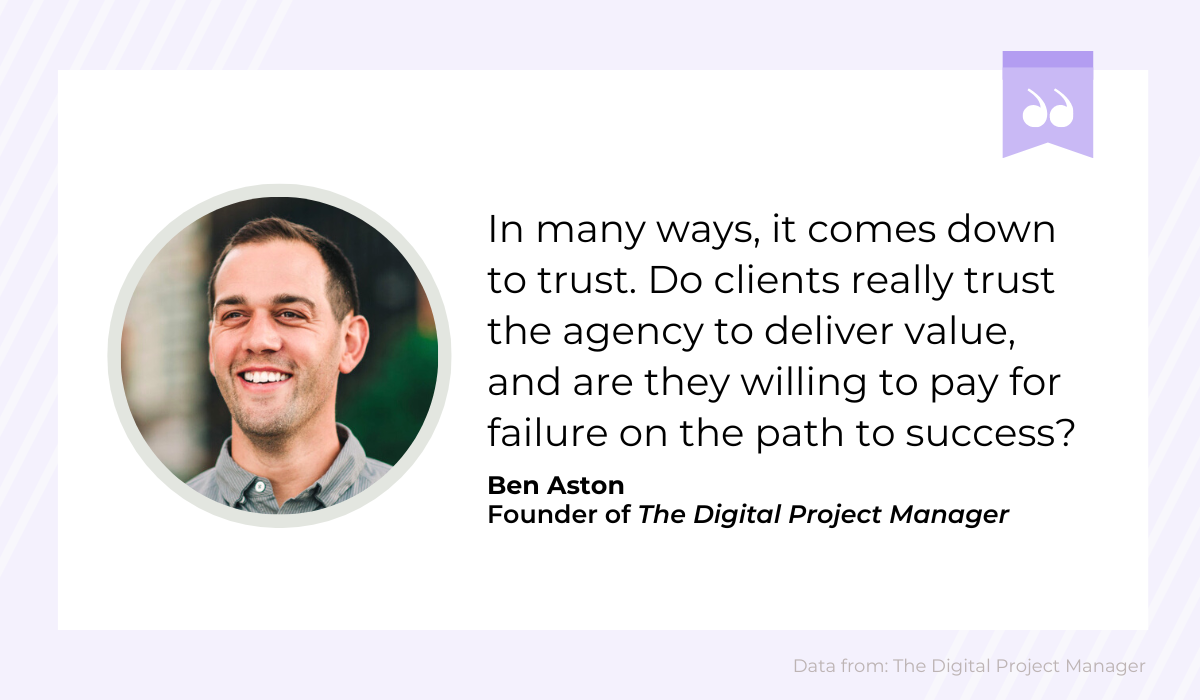
First impressions are often said to be one of the essential factors in any relationship.
Therefore, if you want to establish trust, start off on the right foot with your colleagues from the very beginning.
3. Project background
Once everyone’s acquainted with one another, it’s time to set the scene—to explain the project background.
The client, as the originator and owner of the project itself, typically takes the lead in this part of the meeting.
Ideally, the client will first explain how the project you’re working on fits into their general business plan and make a quick note of some previous projects that yours aligns with.
This information places the current project in its historical context.
Next, the client will present the current pain points and describe how they believe your project will resolve these issues. In short, they will explain why the project is even necessary.
With all that information, you’ll be all set to define the where, why, and how of the project’s implementation.
In other words, now you can get down to the nitty-gritty with the planning, define the overarching goal, and ultimately start the project.
The image below is an excellent visualization of the process:
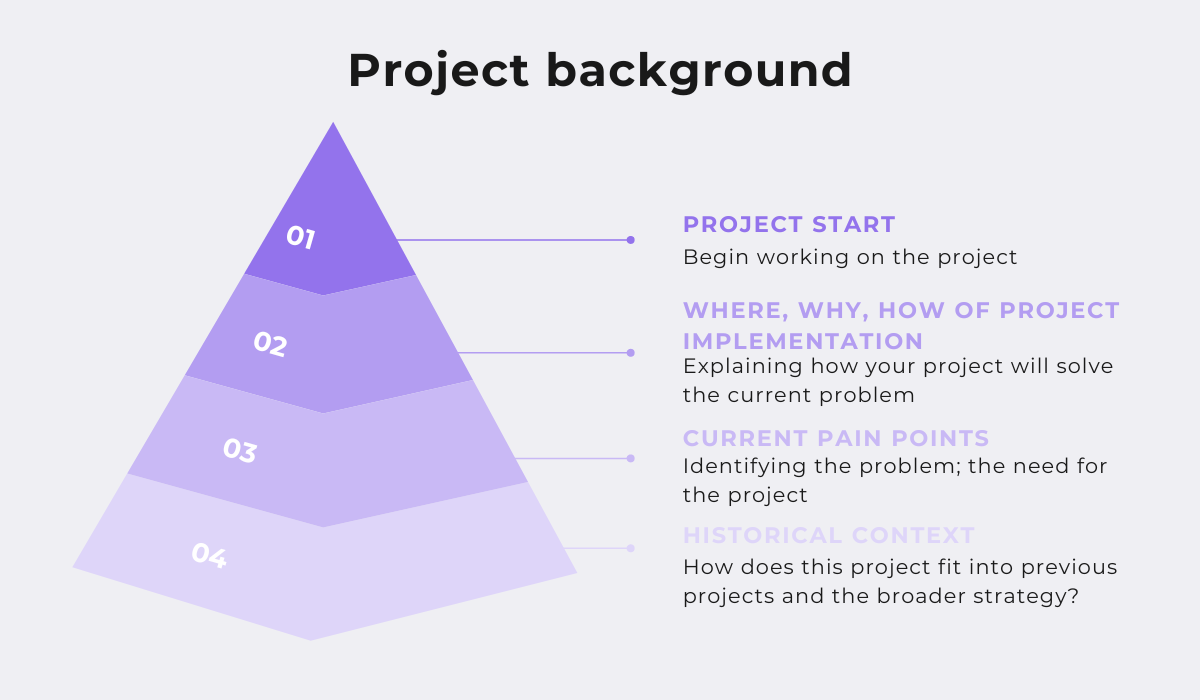
In short, by placing the project in the wider context of the project background, you’re establishing a solid foundation for conducting the project successfully.
4. Project goal
Now that you’re fully briefed on the wider context, your next step is to define the project goal.
This means crafting a concise yet powerful statement that conveys what the project is trying to achieve and why it’s important.
You want something easy to remember, something that your employees can refer back to as they do their work. As you can see, the project goal shouldn’t be overly complex.
Therefore, to compose a practical project goal, we suggest following the SMART framework:
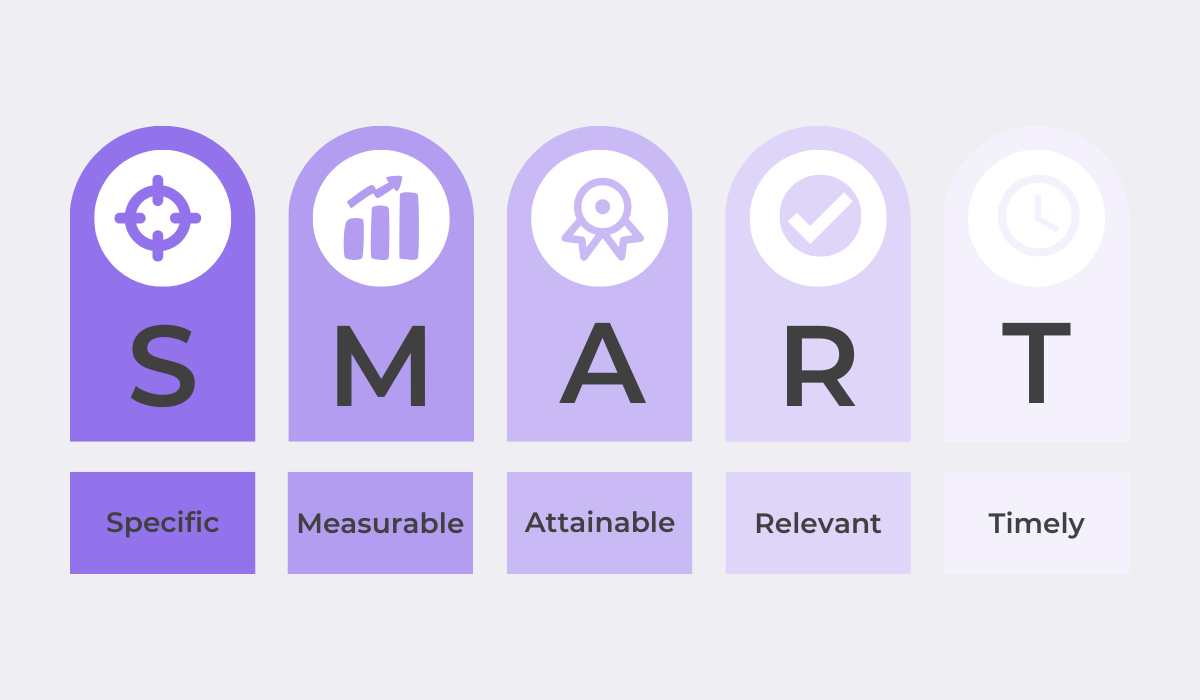
Here’s an example SMART project goal:
In the next five months, build a web-based timesheet data application entry system, primarily used for time-tracking, using PHP, Node.js, and Cron.
You can see that this goal incorporates all five features of SMART delineated above.
It’s time-specific while still being attainable, defines what needs to be done in a way that makes it easy for the participants to gauge whether they’ve met expectations, and has clear relevance to the project at large.
As such, it’s something your team can efficiently work towards.
5. Defining success
After the project goal has been decided, you’ll need to discuss how you and your team will define success.
What does success look like to the stakeholders? What would they consider a job well done?
One effective strategy for establishing a comprehensive definition of success is to set some KPIs—key performance indicators. Ask the client about their requirements.
What do they consider secure software? How many integrations do they need? Then, based on their answers, your team will have concrete benchmarks to work towards.
Here are some common KPI examples you’d do well to discuss with your client:
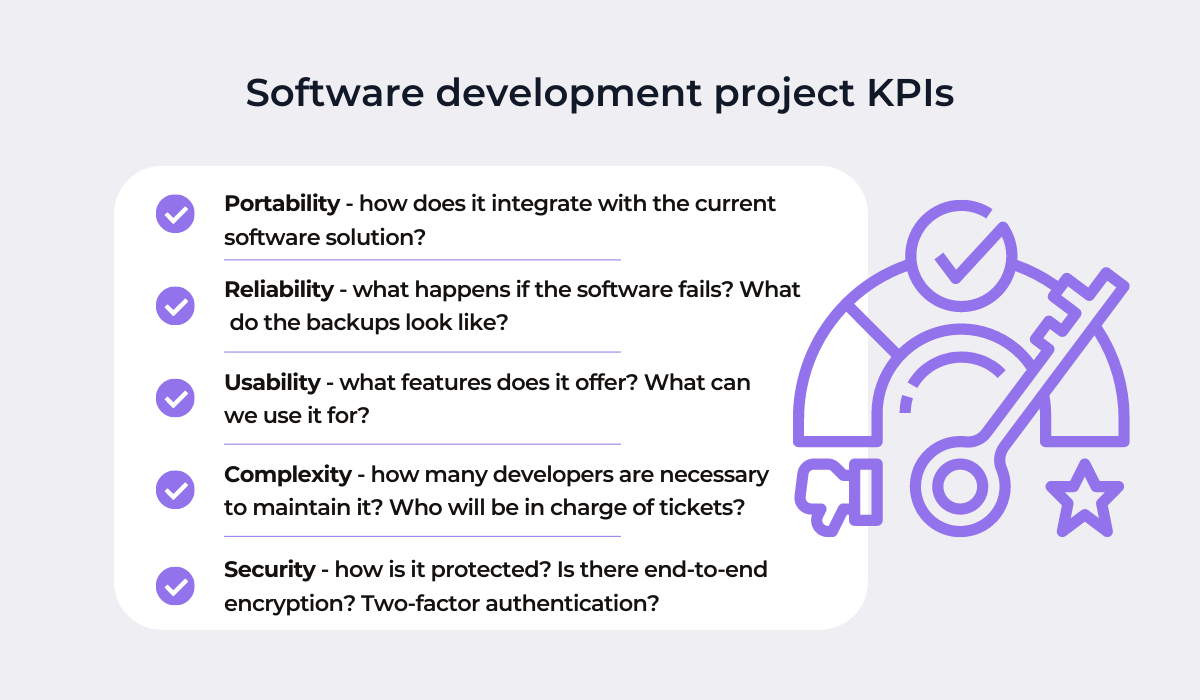
With the answers to these questions, you’ll have your KPIs and be able to easily determine if you’re meeting the client’s expectations.
These KPIs are so helpful because they’re measurable. There’s no room for ambiguity, so your developers will know exactly what they need to accomplish to provide a working product.
They quantify value and as such, they are proof of a job well done.
6. Project scope
The project scope refers to the project’s features, timeline, and budget. To illustrate what this means, let’s return to our earlier example of the timesheet data application entry system.
What is the deployment deadline? By when do they want to begin beta testing? What features have to be included for it to be marketable?
Is it enough to track the standard working time, or should it also record absenteeism and overtime?
The answers to all those questions will decide your project’s scope.
Defining it right at the beginning of your project—during the kickoff meeting—is highly recommended, as it should save you trouble later on.
Liz Corrigan has explained why:
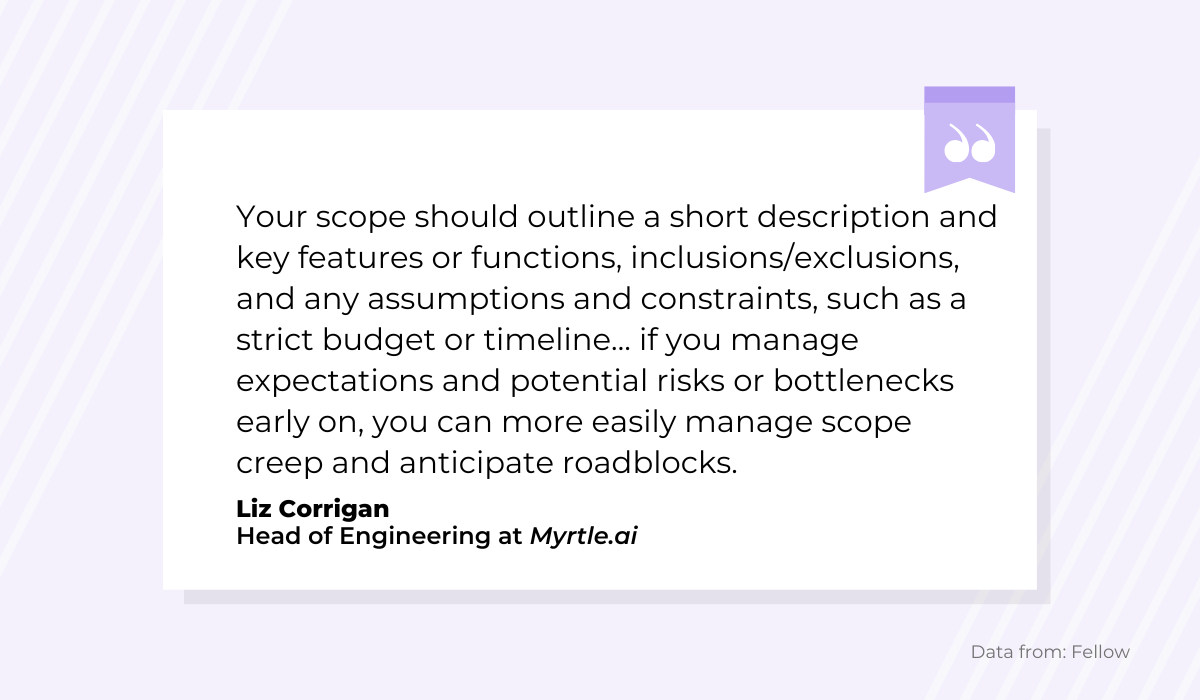
If you agree on your project’s scope as soon as possible, there’s a smaller risk of scope creep and additional requirements sneaking into the project.
A defined scope establishes expectations right at the start and prevents you from going off track.
7. Project plan
By this point, you’ve decided what the project will look like. However, now comes the real challenge—figuring out how it will look like that. It’s time to put together a project plan.
The project plan is essentially a roadmap that determines how you’ll bring the project to completion.
Tasks are broken down into sub-tasks, the final product is distilled into several deliverables, and the deadline is divided into individual milestones.
The project plan is derived from the project scope.
There are several project plan templates, e.g., a traditional timeline, a WBS structure, and a Gantt chart. Below is a typical Gantt chart structure:
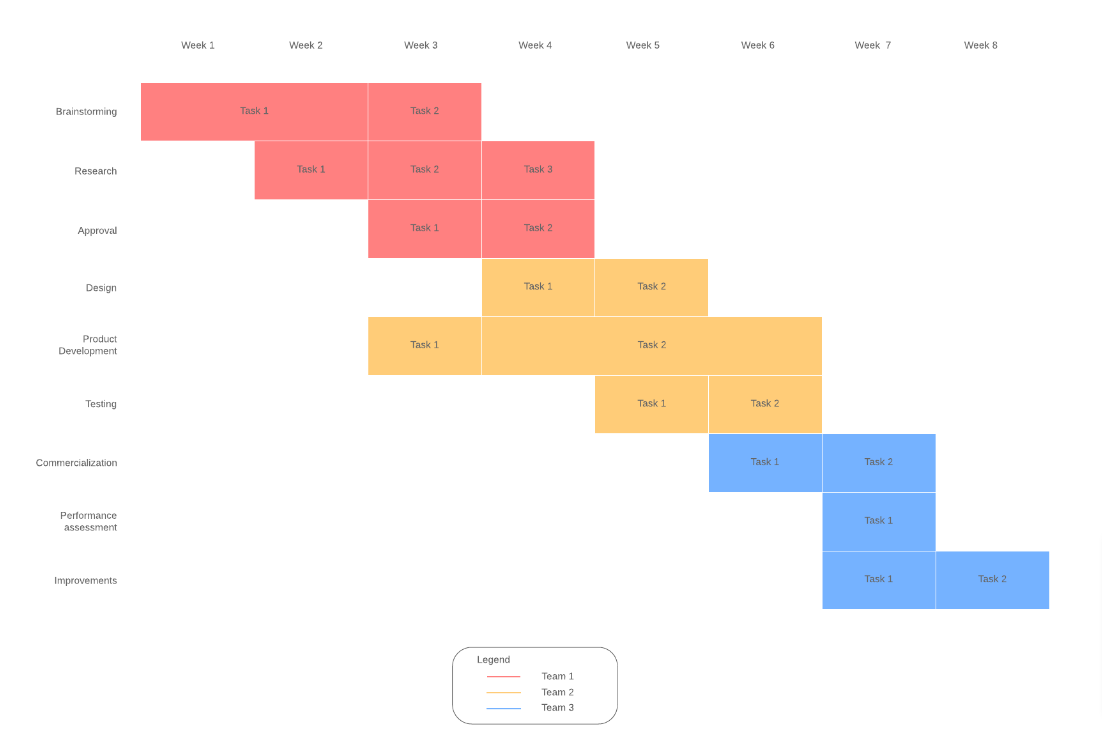
With Gantt charts, projects slowly cascade from task to task.
As a result, you have a clear overview of what these tasks are, their dependencies on one another, when they should be completed, and who conducts them.
8. Project roles
Looking at the project plan above, you’ll notice that the tasks are color-coded and each color is assigned to a specific team.
It’s clear that each team has a distinct set of responsibilities while working on the project.
This task distribution is done during the project kickoff meeting, as that’s when you decide on project roles.
Let’s say you have a question regarding the wireframe design.
With clearly defined project roles, you’ll know exactly whom to ask for help, so you won’t have to waste time hopping between the front-end developers and the designers.
That’s why agreeing on project roles in advance and communicating them to the entire team is so important.
One easy way to define project roles is with the DACI framework. The acronym stands for the following:
- Driver—the person driving everyone to a decision, getting action items completed
- Approver—the person who has the final say in a decision
- Contributor—the person with knowledge who can advise about the task
- Informed—the person who needs to be kept in the loop
Using these labels, you can easily map out the responsibilities in the DACI matrix. Here’s an example:
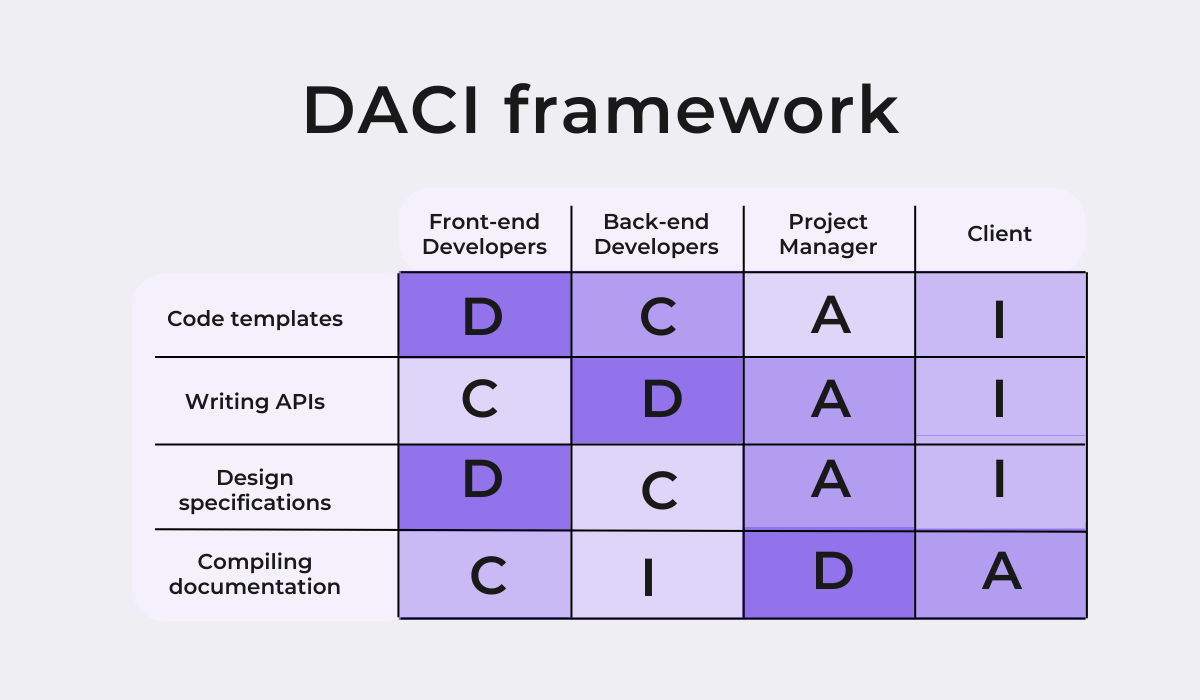
This chart accounts for all possible project roles, making it easy to assign duties to specific people.
9. Project risks
You can never be too prepared when starting a new project. Discussing the risks that the project might incur is an essential part of a project kickoff meeting.
By discussing potential risks right away, you’re providing guidance for your team ahead of time, making sure they’re ready if something doesn’t go as planned.
That way, you’ll have a working strategy for approaching the problem rather than being completely blindsided. Consequently, you’ll also be likely to resolve the issue much faster.
We suggest devising a RAID log—a planning tool for identifying the following:
- Risks—possible setbacks that might occur
- Assumptions—assumed factors that contribute to the project’s success (negative or positive)
- Issues—events that have negatively affected the project’s progress
- Dependencies—triggers that your project depends on
Here’s a sample RAID log:
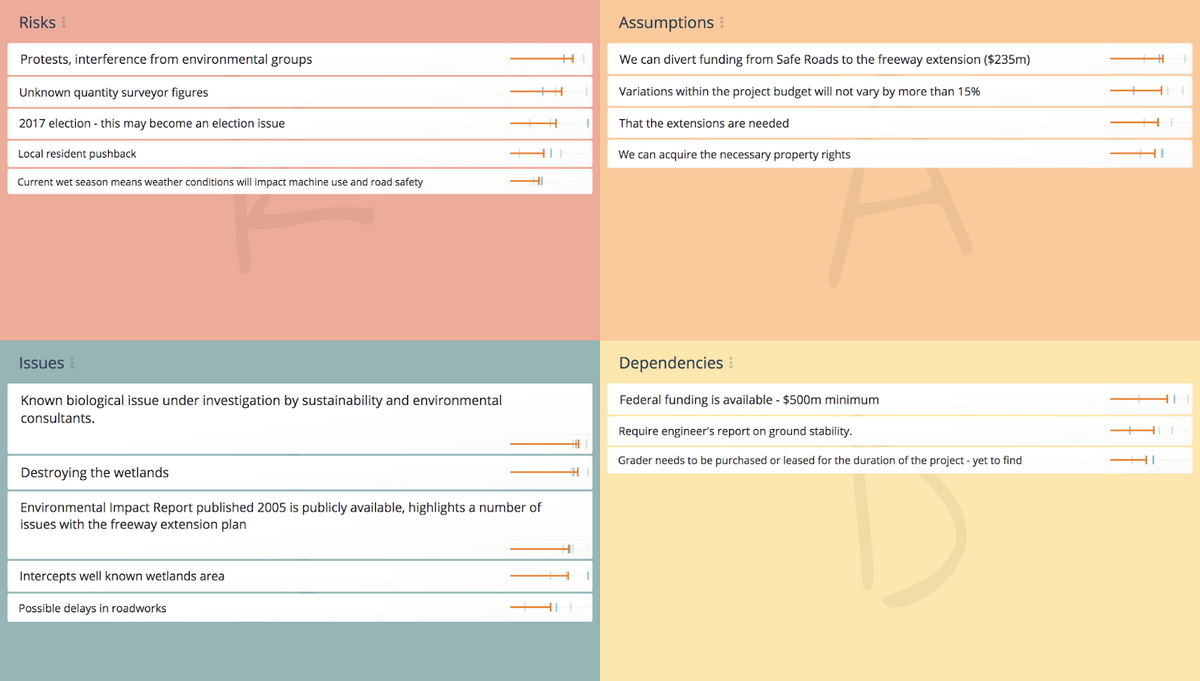
A RAID log helps assess and categorize possible project setbacks. It should be created at the start of the project yet continuously updated as problems arise.
That way, everyone has a reference point for possible problems.
10. Collaboration tools
After going over the details of the project itself, it’s essential to discuss which tools and resources you’ll be using throughout the project, as they will significantly facilitate teamwork, effective communication, and knowledge transfer.
For instance, your developers are sure to appreciate a bug reporting tool.
With Shake, you can effortlessly log issues and errors without the hassle of filling out a bug report, sending emails, or attaching files.
Instead, all you need to do is shake your phone and a bug report is instantly generated.
It contains essential information such as screenshots, screen recordings, steps to reproduce, app version, logs, and more.
Here’s what the report looks like:
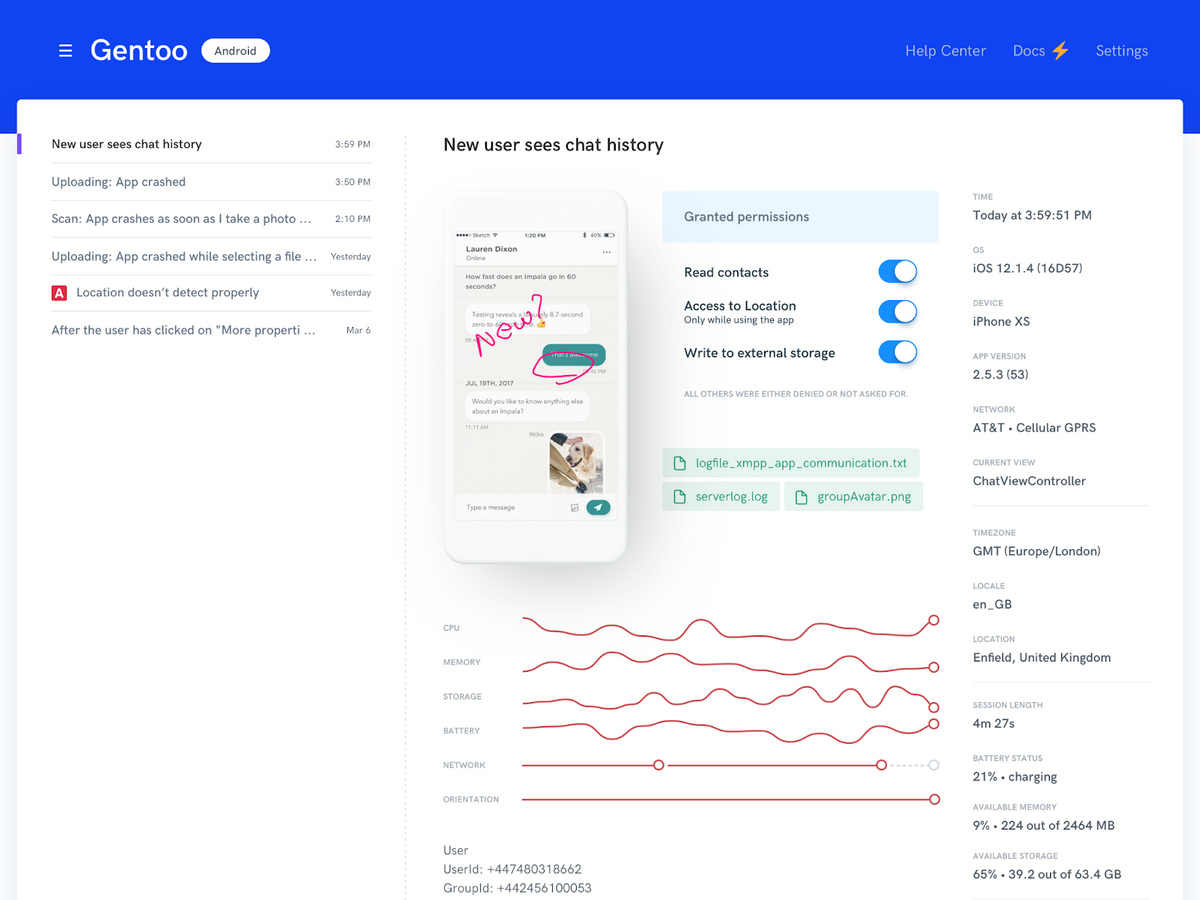
This efficient, streamlined process should swiftly remove any issues as they crop up, as your coworkers won’t have to waste time compiling bug reports. Instead, Shake just does it for them.
11. Next steps
Now that you’ve more-or-less briefed everyone on every aspect of the project, it’s essential to get the gears moving. What happens next?
Everyone must leave the meeting knowing precisely what their tasks are and by when those tasks need to be completed.
To achieve this, we suggest briefly recapping everyone’s project roles, the project goal, and the project plan towards the end of the meeting.
With this review, everyone is reminded of the entire discussion and should depart the meeting with a clear roadmap ahead of them.
Adrien Lemaire, an experienced manager, suggests an additional step:
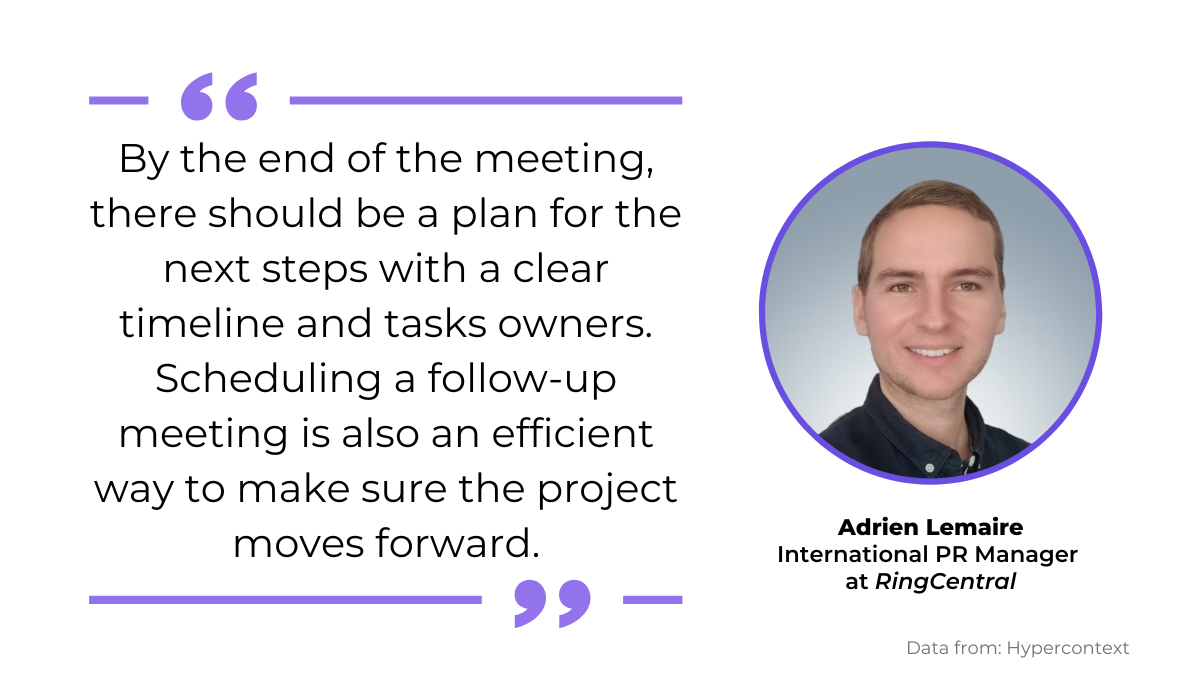
Organizing a follow-up meeting a few days after the initial kickoff meeting is a great idea, as you’ll be able to review everyone’s progress and ensure the project is proceeding as envisioned.
In other words, the follow-up double-checks that the next steps are being properly executed.
12. Questions
Finally, the closing item on your agenda should be a timeslot reserved for questions.
The meeting participants will likely have inquiries, and responding to their concerns will provide clarity.
It’s always better to clear up issues right at the beginning rather than have them rear their heads halfway through the project.

Very handy for handling user feedback. CTOs, devs, testers – rejoice.
For example, if one of your developers identifies a potential risk no one else has noticed and is wondering how to handle it, you can automatically note their concern in the RAID log and better prepare your team.
A Reddit user noted that this Q&A portion is often ignored:
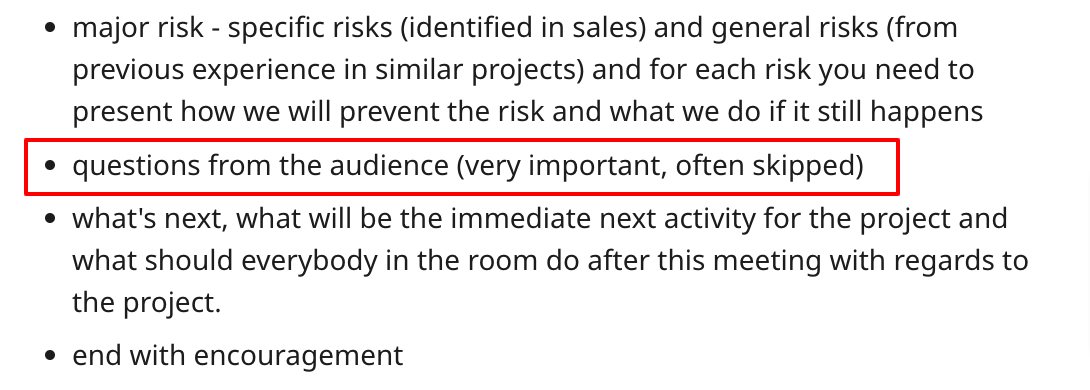
Whatever you do, don’t fortify your colleagues’ opportunity to ask questions.
If you run out of time, encourage everyone to send their questions via a project Slack channel or perhaps organize a second, extremely brief meeting reserved only for Q&A.
Whatever happens, allow your coworkers to ask questions, as it’ll ensure a smooth project start.
Conclusion
In a kickoff meeting, you want to be as thorough as possible, and if you rely on this checklist, you won’t forget to cover any important talking points.
It’s a good idea to start your agenda with a meeting time and set aside some time for introductions.
Moving on, it’s essential to discuss project parameters such as goal, scope, plan, roles, and risks. Don’t forget to take the time to define success and discuss collaboration tools, either.
In the end, conclude the agenda with a Q&A session and clearly define the next steps.
Follow this outline, and you’ll conduct a great project kickoff meeting, ensuring you begin the project right.
