Recommended
What to look for in a beta test management tool

Preparing for a beta testing launch is no small feat.
You need to determine the testing objectives, gather the necessary tools, establish a beta plan, recruit testers, monitor and assess its effectiveness… The list goes on.
But, how can you ensure that you are consistently fully prepared for all these scenarios whenever you want to conduct beta testing?
Have you covered all your bases?
Did you forget something?
It’s easy to overlook a crucial aspect amidst the hustle and bustle of preparation.
This is where the checklist comes into play—to serve as a go-to resource for all your beta testing endeavors, both present and future.
Let’s see what such a checklist should entail!
Table of Contents
Beta testing typically follows after alpha testing, where internal QA experts and other company employees test the application to identify pesky bugs and other lurking gremlins that threaten to impede its proper functioning.
The golden rule you should follow during alpha testing is that the app should be approximately 90% to 95% complete before it can enter the beta testing phase.
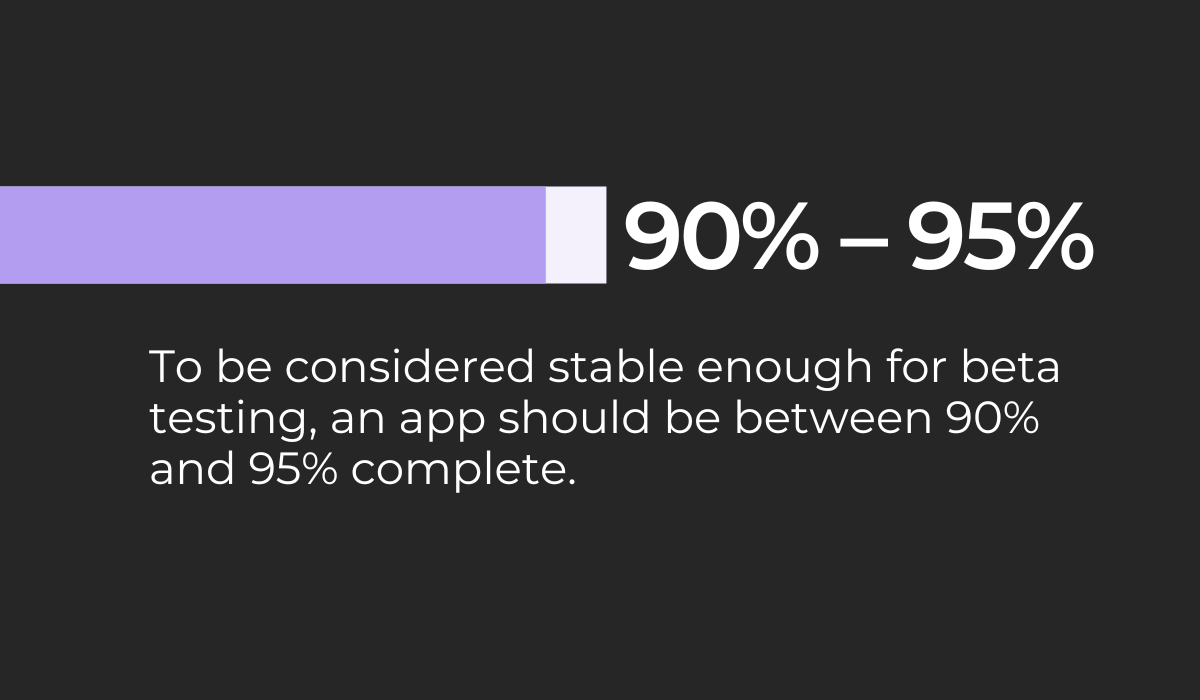
This means it must meet certain alpha exit criteria to be considered stable enough to be handed over to beta testers, who will put it through its paces.
But what exactly are these exit criteria?
Simply put, they are the conditions and parameters that need to be fulfilled so that the testing can be considered complete.
In the case of alpha testing, exit criteria may encompass the following aspects:
Once you’ve successfully checked all these boxes, the application can be considered stable in terms of performance, functionality, and security.

Get unreal data to fix real issues in your app & web.
In other words, it’s ready to be forwarded to the beta testing phase.
Alpha testing is a fantastic practice, but sometimes in the rush of development, teams may skip it altogether and jump straight into the beta phase.
In this case, it would be advisable to at least conduct dogfooding, where you and your team members will use your own app to verify it meets the requirements for application stability.
After you’ve concluded that the app is stable enough for beta testing, the next step involves determining the type of testing you want to conduct.
There are many types to choose from, and when making a decision, it’s pivotal to consider the goals you aim to achieve through this process.
To put it differently, depending on the main objectives, you’ll most likely opt to execute either technical or marketing beta testing.
Technical beta testing can be summarized as follows: the app is still a bit rough around the edges, and beta testers are invited to inspect its functionality, performance, and stability.
The idea is to find lingering bugs, crashes, glitches, and other defects that managed to slip through during previous rounds of testing.
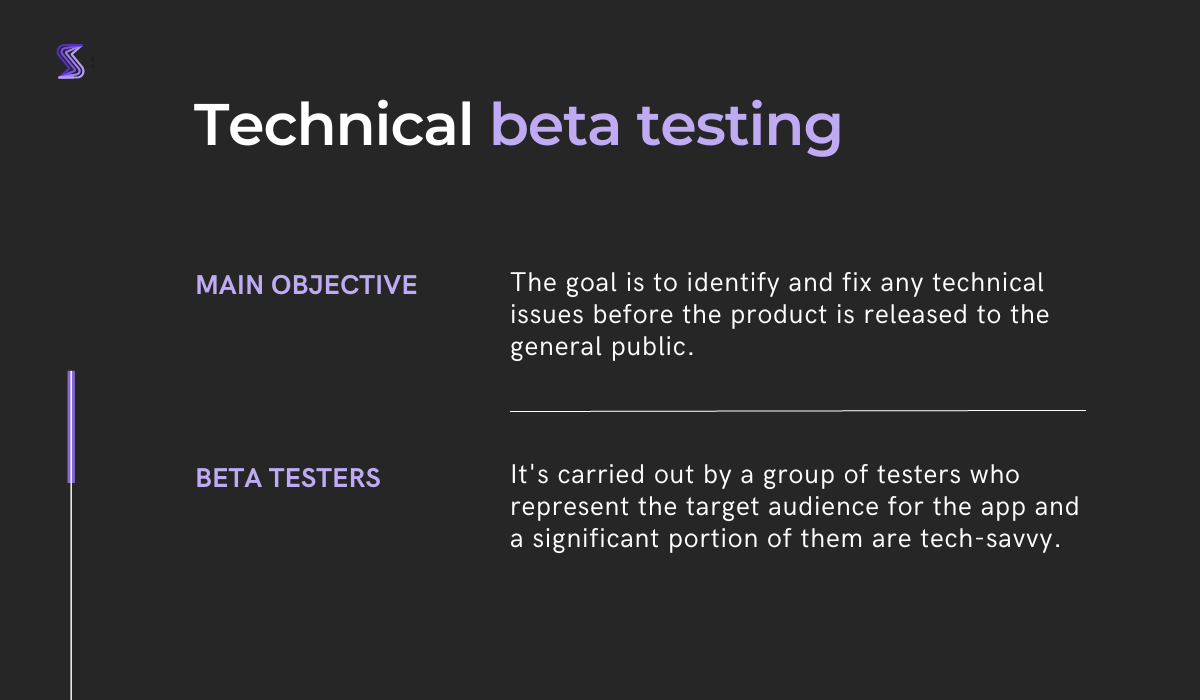
This means that you’ll recruit individuals who are tech-savvy or/and representatives from your user base to serve as beta testers.
In either case, they’ll be expected to provide insights into the functioning of your app from a technical perspective as well.
Technical beta testing is usually invitation-only and closed to the general public, often conducted through specialized platforms where you can segment beta testers to match your desired user profile.
On the other hand, you might already be familiar with marketing beta testing.
You may have seen invitations for it on social media platforms such as Twitter or Facebook, or maybe on the websites of brands you follow.
This specialized type of testing seeks to gauge the marketing appeal of the application itself, while simultaneously creating buzz around its launch and gathering testimonials and reviews that will later help promote it.
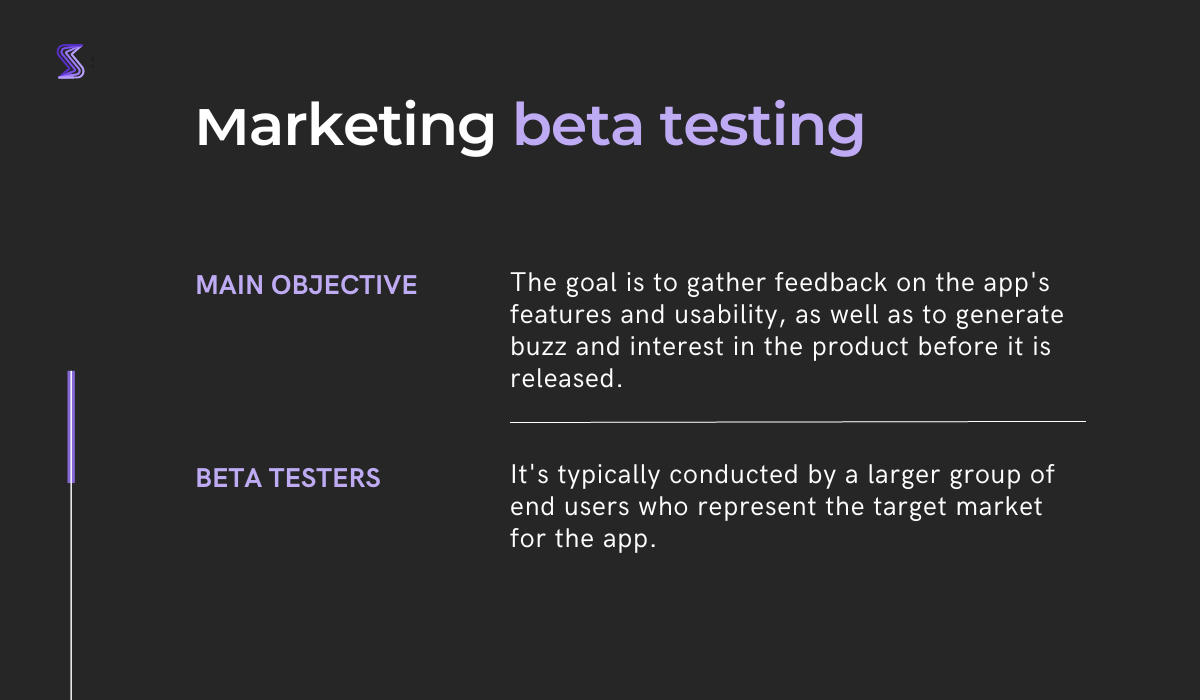
For startups that are launching an app for the first time and want to monitor how users react to it and attract early adopters, this is a typical practice.
Through marketing beta testing, you can obtain really valuable data about your application, such as how users rate its features, what its pain points are, and receive valuable feedback.
Although it’s wise to initially choose one of these two testing types, it’s worth mentioning that one doesn’t necessarily exclude the other.
In other words, after conducting technical beta testing, you may want to proceed with marketing beta testing to create hype around your application.
In such a case, make sure to include both types of testing on your checklist.
If you’re hoping that your beta testing runs like a finely tuned machine, it goes without saying that a well-crafted plan is an absolute prerequisite.
It enables you to set clear objectives, enhance efficiency, minimize risks, eliminate potential hurdles in advance, while offering an array of other benefits.
Now, you might be wondering what this plan should encompass. So, here is a list of the most essential components that should be included.

First and foremost, you need to determine the objective and scope of your testing. This involves specifying what falls within the scope of testing and what is off-limits.
The plan also entails establishing testing tools and environments, roles and responsibilities, entry and exit criteria, and deliverables, to name just a few.
Moreover, a quality beta testing plan should have a detailed schedule to keep everyone involved in testing, from beta testers to developers and project managers, well-informed about the various testing phases.
To give you a visual representation, the image below showcases how teams on Centercode, a widely-known beta testing platform, schedule testing.
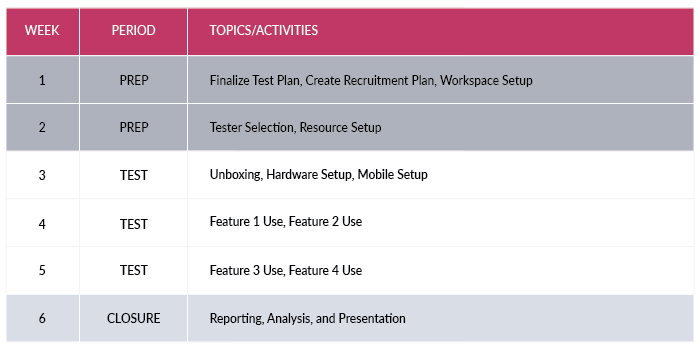
As you can see, Centercode’s testing spans about six weeks.
Two weeks are dedicated to preparations, three weeks are allocated to the actual testing process, and the remaining week serves as a conclusive period for analyzing and presenting the test results.
When you outline the testing timeline in such a crisp and coherent way, all parties involved can really adhere to it, making the entire process more organized and structured.
Keep in mind that there are different ways to structure and write your beta testing plan.
However, the general rule remains: the more detailed your plan is, the smoother the process will flow and the fewer unpleasant surprises you’ll encounter along the way.
So far, your checklist entails ensuring that the app is stable, deciding on the testing approach, and developing a beta test plan.
Now it’s time to select which tools you should employ for your beta testing endeavors.
This crucial step should be taken beforehand to ensure that all tools are primed and ready to go when the testing phase kicks off.
For example, if you need a platform to recruit testers who match your ideal end-user profile, you’ll have quite a few options to consider.
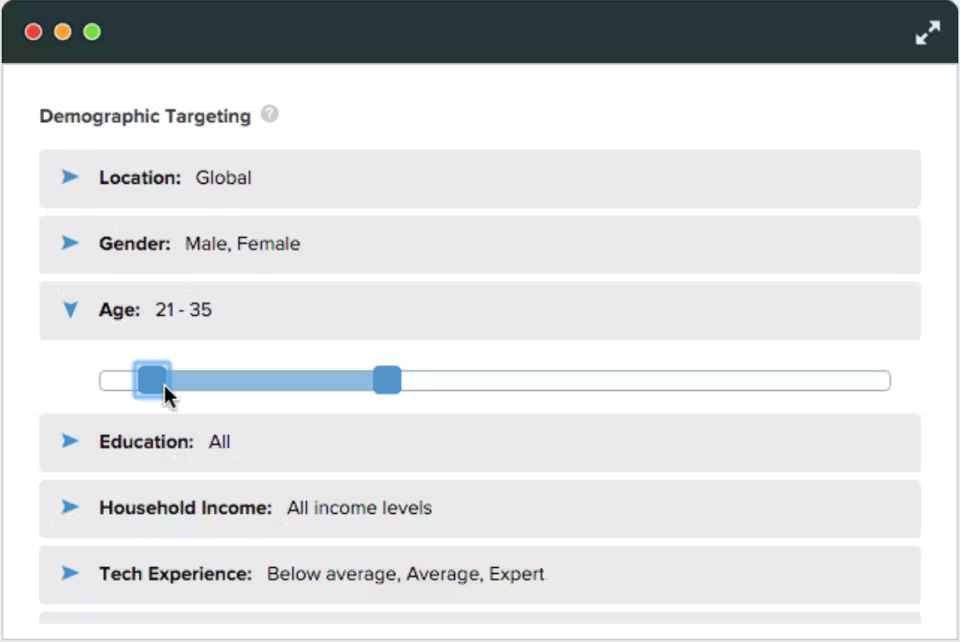
One notable contender in this domain is BetaTesting.
It offers a network comprising more than 350,000 testers that you can filter by location, gender, age, education, and various other parameters, as depicted in the image below.
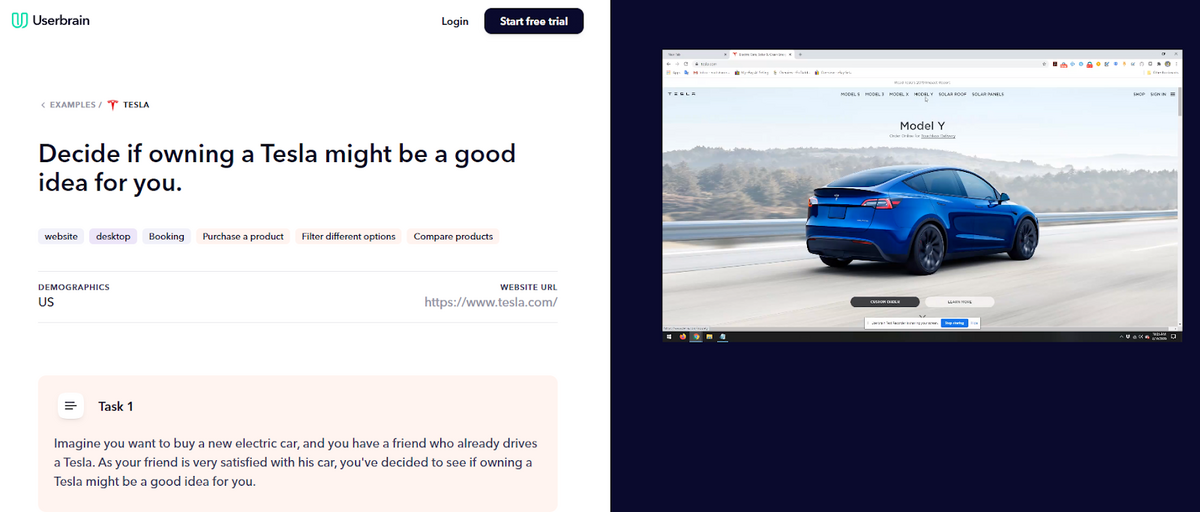
You might also consider utilizing Userbrain, which not only grants you access to an extensive pool of testers but also enables you to record their screen and audio interactions.
In other words, testers will be tasked with using your app while simultaneously narrating their experience out loud, and you will be able to review those recordings at a later stage.
Curious about how it all looks in practice? Take a look at the recording linked below the following image.
Of course, you might also explore tools that facilitate bug reporting, as this is where the value of automation also shines.
Shake, our very own software, can help you in this regard. It’s a lightweight tool that can be easily installed on any iOS or Android device.

After that, everything runs quite smoothly.
When beta testers stumble upon a pesky bug within the app, they just need to shake their mobile device, and Shake will automatically generate a comprehensive bug report.
This report will encompass more than 70 data points related to the environmental context (some of which are listed in the picture below), which are invaluable for developers who need to rectify these issues.
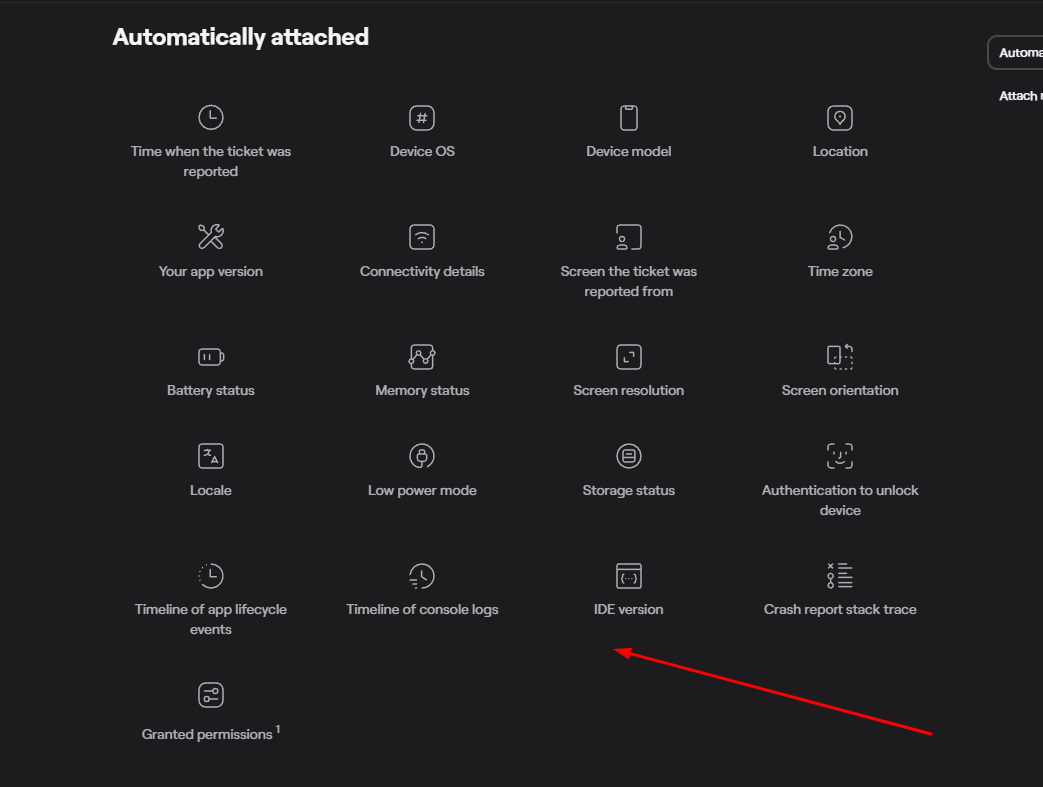
Without such a tool, testers would be compelled to manually input all that data themselves.
And let’s be honest, not everyone possesses the technical expertise to accurately identify and communicate this kind of information.
Therefore, having good bug reporting on board can significantly facilitate the entire beta testing process.
Remember, every beta testing process is unique, just like every application has its own set of distinct requirements.
Therefore, it’s paramount to determine in advance which tools align best with your needs so that you can get the most out of your beta testing.
When it comes to beta testing, the popular saying rings true: “You can’t improve what you can’t measure.”
If you don’t collect and analyze your test metrics, the yardstick of success can elude your beta testing efforts, and therefore you won’t be able to improve it.
This means you risk not maximizing its potential.
Now, this doesn’t imply that you need to measure every minute detail because, as Chris Rader, VP of Marketing at Centercode, cautions, taking that approach would be counterproductive in the long run.
Grabbing millions of metrics when you first start out stretches your bandwidth too thin and makes it harder to keep up with those metrics as time goes on.
Instead, he recommends narrowing your focus to four pivotal metrics: quality, satisfaction, output, and efficiency.
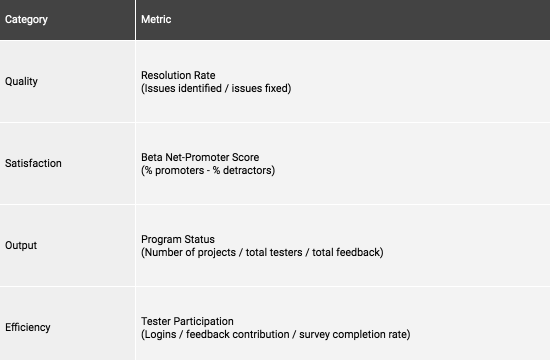
Quality stands tall as one of the most crucial and probably easiest metrics to measure because it revolves around the question of how many issues beta testers have found and how many of those issues have been resolved.
Since it speaks volumes about how well beta testers are able to identify issues and whether their feedback leads to issue resolution, this metric helps determine the value of the collected data.
On the other hand, the Net Promoter Score (NPS), which gauges the satisfaction metric, will show you how content testers are with your app.
Periodically, you can ask testers to rate, on a scale of 1 to 10, their inclination to recommend the application to their friends or relatives.
As illustrated below, scores of 9 or 10 indicate promoters, ratings from 0 to 6 classify detractors, and results of 7 or 8 signal individuals who remain passive.
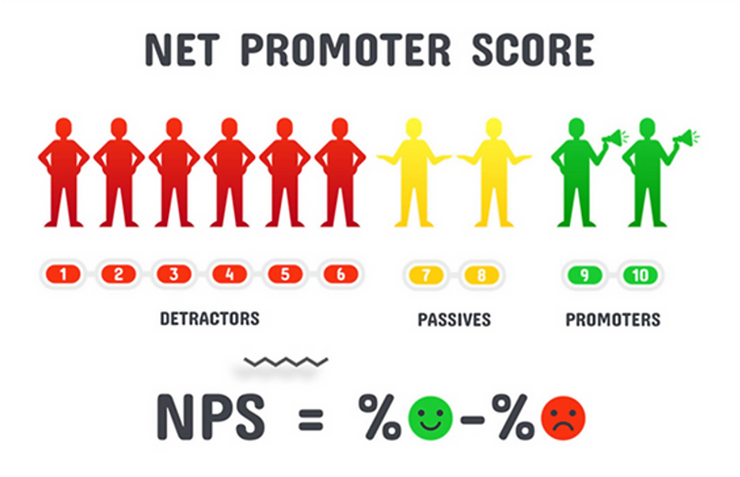
In other words, satisfaction metrics can provide crucial insights into potential user experience problems.
Equally important are output metrics, which paint a clear picture of the extent of beta testing activity.
This is conducted by observing the number of ongoing beta projects, completed projects, the volume of feedback received from these projects, and so on.
Efficiency is another metric that yields invaluable insights because it actually speaks to the success of beta testing. It’s measured by examining the involvement of beta testers, such as how many of them log in, submit feedback, and fill out surveys.
This metric unfailingly reveals whether testers are engaging with your app or simply casually browsing it without thoroughly examining it.
From all of the above, it becomes clear that if you want to continuously improve your beta testing, measurement is a step you cannot skip.
Beta testing presents an excellent opportunity for your company to create buzz around your app and draw in more potential beta testers.
These testers, once they experience the benefits of your app firsthand, could become your earliest adopters and brand advocates who will spread positive word-of-mouth when you finally launch it to a broader audience.
But how can you kickstart this process in motion?
First off, utilize your presence on social media.
Use platforms such as Facebook, Twitter, and Instagram to make it known that your app has entered the beta testing phase and is available for testing.
Those who already follow your company on social media or are active on online forums where your target audience resides may just be itching to get their hands on your app, simultaneously fueling the anticipation for its eventual launch.
Here’s a tweet that illustrates this point.

Crafting a compelling post that urges your followers to sign up for beta testing is all it takes.
And if these testers discover value in your app, they might even leave comments beneath your posts, which can exponentially extend their reach and expose your app to an even larger audience.
Announcing your beta program on your website is another smart move to attract potential beta testers.
Capture, Annotate & Share in Seconds with our Free Chrome Extension!
After all, visitors to your website are already displaying interest in what you have to offer, so why not invite them to contribute their input to your application?
PlayStation, for instance, utilized their website to attract beta testers and generate excitement around the new features of PlayStation 5.
In the example below, you can see how such a page might look.
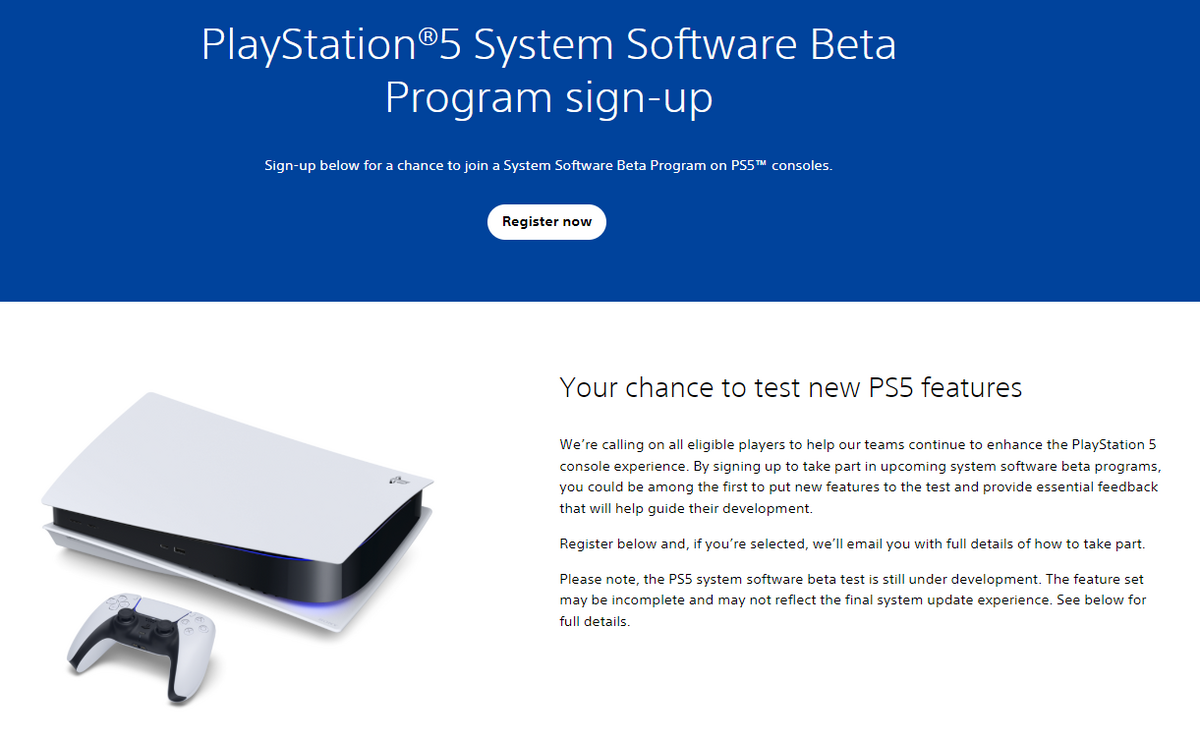
You’ll notice that they provide basic guidelines related to testing and the selection process.
This establishes credibility in the testing process and, consequently, instills confidence in the quality of the beta product.
In today’s digital marketing, where influencer recommendations hold tremendous sway over consumer choices, a great tactic is to also invite industry influencers to enroll in your beta program.
By granting them exclusive early access to your application, you offer them an opportunity to review it and potentially become its initial advocates.
These reviews, especially if they come from influencers with a strong following and engaged fan base, can captivate a considerable number of future users even before the app is officially released.
Of course, the strategies mentioned here merely scratch the surface, as there exist countless other methods that can yield remarkable results.
By fully harnessing the potential of the promotional activities at your disposal, you can significantly increase the pool of users willing to test your app and ignite interest in it long before it hits the market.
If you want your beta testing launch to be smooth sailing, nothing is more essential than having a well-structured checklist ready.
Beta testing involves a lot of moving pieces that need to be perfectly aligned for it to be successful.
Therefore, a checklist helps organize everything in advance and prevents any unforeseen setbacks that could disrupt the process.
Hopefully, the checklist we’ve presented in this article will navigate you through your preparatory stages and provide a record of every essential facet that demands your attention before the beta launch.
From internal bug reporting to production and customer support, our all-in-one SDK gets you all the right clues to fix issues in your mobile app and website.
We love to think it makes CTOs life easier, QA tester’s reports better and dev’s coding faster. If you agree that user feedback is key – Shake is your door lock.
Read more about us here.

Add to app in minutes

Doesn’t affect app speed

GDPR & CCPA compliant

Unexpected things pop up
Just like bugs in your app or web 🐛 Fix them now with just one reporting tool.